 how-to
7 Things Photo-Backed Vehicle Inspections Reveal
Last Updated: November 4, 2026
Quick Summary
A photo-backed inspection is a vehicle condition report where every finding is documented with a time-stamped photo, not just a technician's written note. Photo-backed inspections let you see the worn part, the measurement, and the odometer reading before you approve any work.
- Photo-backed reports show the brake pad, tire tread, and leak with the odometer reading in frame.
- Ask to see the photo of a worn tie rod when a shop recommends new ones.
- Defensible records need intact EXIF metadata like DateTimeOriginal and GPS coordinates.
- Shoot four standard angles every visit so month-over-month comparison stays reliable.
- If the estimate system is separate from the inspection photos, the link between image and charge breaks.
Table of Contents
- What a Photo-Backed Vehicle Inspection Actually Shows You
- What Is Included in a Comprehensive Vehicle Inspection
- How to Read a Mechanic's Diagnostic Report Without a Mechanical Background
- How to Verify Auto Repair Estimates Against the Photos
- Photo Evidence and Fraud Prevention: Why Pictures Beat Descriptions
- Camera Angles, Metadata, and What Makes Inspection Records Defensible
- Consumer Photos vs. Commercial-Grade Fleet Documentation
- Build Your Own DIY Inspection Photo Checklist
- Frequently Asked Questions
What a Photo-Backed Vehicle Inspection Actually Shows You
Understanding photo backed vehicle inspections starts with one fact: a photo-backed inspection is a vehicle condition report where every finding is documented with a time-stamped photo, not just a technician's written note.
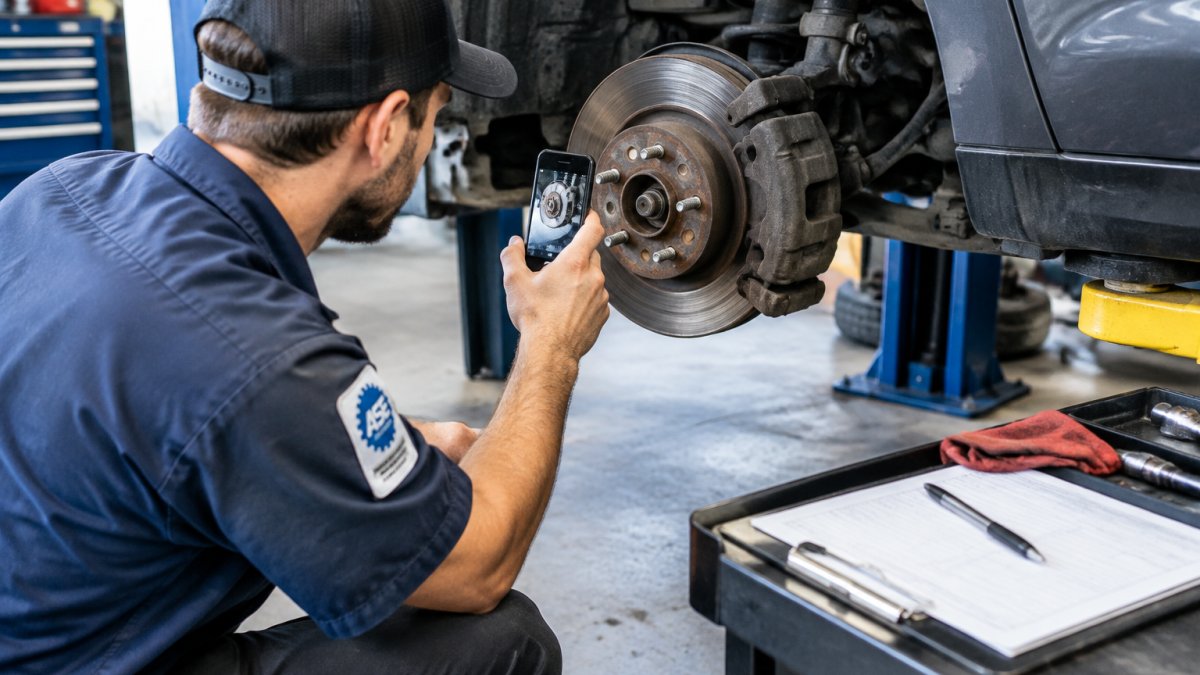
A photo-backed report shows you the brake pad, the tire tread, and the leak, with the odometer reading in the frame.
The Two Types of Vehicle Inspections and How They Differ
Inspections generally take one of two styles.
- Verbal or written-only inspection: The technician notes problems on paper. You get a list of codes and descriptions with no pictures.
- Photo-backed inspection: The technician captures images of each issue, often with the part still on the car. You see wear and tear directly.
The second type gives you photographs of the findings you can review.
What Is Included in a Comprehensive Vehicle Inspection
A comprehensive vehicle inspection covers the major systems that affect safety and reliability. You can see the full range of what we handle on our services page.
Here is what a thorough inspection generally covers:
- Brake pads, rotors, and brake fluid condition
- Tire tread depth and uneven wear patterns
- Suspension parts, including struts and shocks
The Parts Most Drivers Never Think to Ask About
Some of the costliest problems hide where nobody looks. Ask about these specifically.
- Struts and shocks: A leaking strut is easy to photograph and easy to ignore until handling suffers.
- Belt condition: A glazed or cracked serpentine belt can strand you without warning.
- Tire wear patterns: Uneven tread often signals an alignment problem, which shortens tire life.
- Brake pad thickness: Measured in millimeters, this is one of the clearest photo subjects on any report.
How to Read a Mechanic's Diagnostic Report Without a Mechanical Background
You do not need to be a mechanic to read a diagnostic report, but you do need to know what to look for. Start with the summary section, then match each listed issue to its photo. If a term stops you, a plain-language auto repair dictionary can decode it fast.
A few habits make reports easier to read:
- Read the technician notes next to each photo, not just the headline.
- Look for the odometer reading to confirm the report matches your visit.
- Check whether each item is marked "monitor," "recommend," or "urgent."
- Ask what happens if you wait on any "recommend" item.
The goal is to understand every line item before you approve it.
How to Verify Auto Repair Estimates Against the Photos
Verifying an estimate means checking that every charge lines up with a photo and a measurement. When you know how to verify auto repair estimates, an upsell attempt gets obvious fast. If a shop says you need new tie rods, ask to see the photo of the worn tie rod.
A simple check:
| What to Check | What to Look For | Red Flag |
|---|---|---|
| Photo match | Each line item has a photo | No photo for a big-ticket item |
| Measurement | Brake pad thickness or tread depth shown | "It's worn out" with no number |
| Odometer | Reading visible in the frame | No date or mileage shown |
| Priority | Urgent vs. monitor clearly labeled | Everything marked urgent |
If something does not add up, ask before you authorize anything. You can always book service or reach the shop to talk it through first.
Photo Evidence and Fraud Prevention: Why Pictures Beat Descriptions
Fraud prevention in auto repair comes down to accountability. A photo-backed report makes it much harder to bill for parts that were never needed or work that was never done.
The logic is straightforward:
- A written claim can be invented. A photo of your actual part cannot.
- Time-stamped images tie a finding to a specific visit.
- You approve work based on evidence, not pressure.
- Disputes get resolved with records instead of arguments.
That transparency protects you and the shop. Consumer advice on auto repair from the FTC reminds drivers to get written estimates and keep records, which is exactly what a photo-backed report gives you.
Camera Angles, Metadata, and What Makes Inspection Records Defensible
Defensible records need more than a picture. They need context: which vehicle, which visit, and when. That context lives in the metadata attached to each image, and the difference between a snapshot and evidence is whether that metadata is intact and specific.
Metadata is the hidden data stored inside a photo file. Most phone cameras write EXIF (Exchangeable Image File Format) data automatically.
The EXIF Fields That Actually Hold Up
- DateTimeOriginal: The moment the shutter fired, recorded by the camera, not typed in later. This is the field most often relied on to tie a photo to a visit date.
- GPSLatitude and GPSLongitude: Where the device was when the photo was taken, when location services are enabled. This is what ties an image to a shop bay rather than a stock photo library.
- Make and Model: The device that captured the image. A consistent device ID across a report supports the claim that one technician shot the whole inspection.
- BodySerialNumber: On many dedicated cameras, a hardware serial that is harder to spoof than a filename.
Standard Camera Angles That Make a Record Repeatable
Good inspection photos follow a consistent sequence so any reviewer, you, a service advisor, or an insurer, can compare one visit to the next:
- A wide shot showing the part in place on the vehicle, with surrounding components visible for context
- A close-up showing the wear or damage at the point of failure
- A measurement shot with a gauge, tread depth tool, or ruler in frame
- A VIN verification or odometer reading to tie the record to your specific car
Shooting the same four angles every time is what turns a pile of photos into a comparable history. When angles drift between visits, month-over-month comparison gets unreliable fast.
What Makes a Record Defensible
Defensibility is not a single feature; it is a chain. The image, the metadata, the measurement, and the vehicle identifier all have to agree. If the odometer in the frame does not match the mileage on the repair order, the record has a gap.
Consumer advice on auto repair from the FTC recommends keeping written estimates and records; a photo-backed report with intact EXIF data is the strongest version of that record.
Consumer Photos vs. Commercial-Grade Fleet Documentation
Fleet documentation demands more than a consumer inspection. A single driver's phone photo works fine for one car.
Here is how the two compare:
- Consumer inspection: One vehicle, one visit, photos for personal peace of mind. The owner decides what to shoot and when.
- Fleet documentation: Many vehicles, scheduled intervals, photos tied to compliance and liability. The capture process is standardized so records are comparable across drivers and locations.
- Fleet standards: Image resolution, camera angles, and metadata often need to meet internal or insurer requirements. A fleet policy may specify minimum resolution, required angles per component, and retention periods for the image files.
- Fleet workflow: Records feed into fleet maintenance schedules and safety standards tracking, and they are usually reviewed by someone other than the person who took the photo.
For fleet managers, the photo-backed report becomes part of a larger paper trail. It supports damage claims, repair authorization, and proof that required maintenance happened on time. The value is not the photo itself; it is the audit trail the photo anchors.
How a Photo Triggers a Repair Estimate
This is the part most consumer-facing articles skip, and it is where photo-backed inspections earn their keep in a modern shop. The workflow is a chain, and each link depends on the one before it:
- Capture: The technician photographs the worn part in place, following the standard angles, with a measurement in frame where applicable.
- Tag: The image is attached to a specific line item on the inspection form, not dumped into a general folder. The tag is what connects the picture to a component, a labor operation, and a parts number.
- Severity coding: The technician marks the item as monitor, recommend, or urgent. That code, not the photo alone, drives priority.
- Estimate generation: The inspection software maps the tagged line item to a labor time and a parts price, and the estimate is built from the same record the customer is looking at. The photo and the charge are linked by the tag, not by memory.
- Customer approval: You see the photo, the measurement, and the price on the same line, and you approve or decline each item individually.
Watch out: if the estimate is generated in a separate system from the inspection photos, the link between image and charge breaks, and you lose the accountability that made the photo valuable in the first place. Ask whether the photo and the line item live in the same record.
Where the Two Approaches Overlap
Both consumer and fleet inspections benefit from the same core discipline: shoot the same angles, keep the metadata intact, and tie every photo to a vehicle identifier. The difference is scale and consequence. A consumer uses the record to decide whether to approve a repair. A fleet uses it to prove that required maintenance happened, to allocate repair costs across vehicles, and to defend against damage claims.
Build Your Own DIY Inspection Photo Checklist
You can document your own vehicle between shop visits. A simple photo checklist catches small problems before they grow.
- Odometer reading, clearly in frame
- Each tire, straight on, showing tread depth
- Brake pads through the wheel spokes, close up
- Engine bay, wide shot, for leaks or fluid residue
Shoot the same angles each time to compare photos month to month.
Frequently Asked Questions
What is a photo-backed vehicle inspection?
It is a vehicle condition report where every finding a technician notes is paired with a dated photograph of the actual part on your car. Instead of a line that says 'front brakes worn,' you see the brake pad next to a tread depth gauge. Photo-backed inspections give you visual evidence you can compare against the written estimate before you authorize any repair.
How do digital vehicle inspections prevent unnecessary repair costs?
Each recommendation has to survive a picture. A technician who photographs a leaking strut, a cracked belt, or a tire at 3/32 inch of tread is showing you the reason for the repair, not just asserting it. When you can see the wear and tear yourself, you can decide which items to approve. Ask for the photos before you sign anything, and compare them to the itemized estimate line by line.
Are photo-backed inspection reports useful for insurance damage claims?
Photos with timestamps and metadata can create a record of your vehicle's condition at a specific date. Insurers still apply their own rules, so check your policy for what documentation it requires. Keep the full report, including the VIN and odometer reading, rather than just the repair invoice.
What should I look for in a technician's photo report?
Check four things: clear close-ups rather than distant shots, a visible reference for scale such as a tread depth gauge or coin, the VIN and odometer reading in the report header, and a plain-language note explaining what the photo proves. If a photo is blurry or the angle hides the defect, ask for a better one. A shop confident in its findings will take the second shot without hesitation.
Knowing how to read a photo-backed report puts you in control of every repair decision. At Mason Street Auto Care, our ASE-certified technicians back every inspection with clear photos, plain-English estimates, and warranty-backed work, so you never have to guess what your car needs. Get started with Mason Street Auto Care and schedule your next inspection with confidence.
